
Guide to Every Creature Rescue in Jupiter & Mars
- Nov 11, 2019
- 7 min read
Trying to find every last creature that you can rescue in Jupiter & Mars? We've put together this handy strategy guide with the help of Shadiochao’s video guide on YouTube showing all of the creature rescue locations. If you need additional context to try to find one, the video guide is especially helpful. Hope these tips are useful! Also see the Jupiter & Mars Walkthrough Strategy Guide or the Guide to all Treasures.
SUNPOOL
Turtle 1 – The easiest turtle to find is right by the mother turtle. It’s so close that it could be mistaken for already being rescued, so just make sure you’ve actually freed it from the plastic.

Turtle 2 – Another turtle is hidden in a small cove not too far from the mother turtle, just in front of a few jellyfish.

Turtle 3 – Another turtle is off by itself somewhat near to a set of rock formations that you can swim under.

Turtle 4 - Another turtle is hiding under the rock formations. Just use your echolocation and you’ll spot it.

Turtle 5 – In one of the corners of the area where you’re looking for the turtles is an opening passageway with a tiny elevated area that you can swim into. The last turtle is waiting for you there.

Crab 1 – After the first cave in the game following the tutorial section you’ll come across this easy to spot crab.

Crab 2 – In the section after the first cave and before you get to the open area with the whale tail stone structure is the second crab ahead of some jellyfish.

Crab 3 – This crab is in the large deep cave in the level, just before you exit.

Crab 4 – Outside of the large deep cave is a sunken boat. Sitting on top of the boat is another crab to rescue.

Crab 5 – In the area where you have to rescue the manta rays to open the large wall, one of the crabs is hidden behind a set of large boulders (it’s found in the wide open area with the large pillar rock structures that you can swim under – look off to the side for some boulders and swim behind them to find the crab).

Crab 6 – Upon a return visit to Sunpool, near to the large Elder whale are three branching paths you can take back into the level. If you swim down the middle one you’ll eventually get to a rectangular-shaped cave that slopes down. At the entrance of this cave is the crab.

Manta Ray 1– The first manta ray is immediately on your path following the first AHD encounter in the level. It’s in a wide open area with pillar rock structures that you can swim under.

Manta Ray 2– Another manta ray is hidden by the large wall, on the far side of where it wraps around and meets the rocks.

Manta Ray 3 – Another manta ray is found via a path off to the side from the main open area with the rock pillar structures that you can swim under. From that area, just look for a path to the side (not from where you originally came from where the AHD is and not the path that leads you through the spikey urchins). Just a little ways down the path is a small cave that has the manta in it.

Manta Ray 4 – Near to the large wall generator (if you turn around and face away from the wall/generator) is a path you can take with urchin spikes. Navigate through the spikes and you’ll find the manta.

Pufferfish 1 – Upon a return visit to Sunpool, near to the large Elder whale are three branching paths you can take back into the level. If you swim down the middle one you’ll see some pufferfish circling one larger one that you need to rescue.

Pufferfish 2 and 3 - Upon a return visit to Sunpool, near to the large Elder whale are three branching paths you can take back into the level. If you swim down the middle one you’ll eventually get to a rectangular-shaped cave that slopes down. At the bottom of this cave are two pufferfish swimming next to each other that need rescuing.

Pufferfish 4 – In the general area where the pufferfish are found in Sunpool, look for the spot where there’s a drone circling. Right by it is one of the pufferfish you need to rescue.

Pufferfish 5-7 – Right near to where the previous pufferfish was (where the drone is circling) is a metal grate that you can smash that leads to a pathway where these three pufferfish are hidden. (You can also access this pathway via breaking the metal grate near to the sunken ship at the exit of the large cave).

Mako Shark– At the very bottom area of the large cave you swim into (where the turtles are swimming) is the mako shark.

CLOCKTOWER
Pufferfish 1 – The easiest pufferfish to find is the one sitting right at the Tower Bridge.

Pufferfish 2 – Another pufferfish is hidden in a small subway station entrance a little past the Tower Bridge. Just look for the grate that you can smash and the puffer is right behind it.

Pufferfish 3 – Another pufferfish is inside a caged area just outside the stadium entrance.

Pufferfish 4 – Near the entrance to the stadium are two entrances that lead into the underground subway station. One of the pufferfish is hidden behind a rock you can break.

Pufferfish 5 – Also in the underground subway station near to the stadium is a pufferfish that you can access by breaking a metal grate.

Mako Shark– Later in the level is the large train station with the train cars in it. If you swim to the back of the stadion there’s a subway tunnel that you can enter. Keep swimming along this tunnel for quite a while. Eventually you’ll get to a point where the path is blocked off. But instead of heading back the way you came, look for a path that leads to the side and you’ll find the mako shark. (Following this path also lets you swim directly to the Elder whale).

PLASTIC BEACH
Conch 1 – One of the conches is hidden near the drone. Look for the dump trucks and there’s a trap in the back of one with the conch.

Conch 2 – Look for the large side path that splits off from your main path and you’ll find a conch (the side path is relatively near to the highly visible antenna looking structure that sits in the middle of the area).

Conch 3 – One of the easier conches to find is right by the antenna looking structure.

Conch 4 – Another conch is found in a small path directly near to where the antenna looking structure sits in the middle of the area.
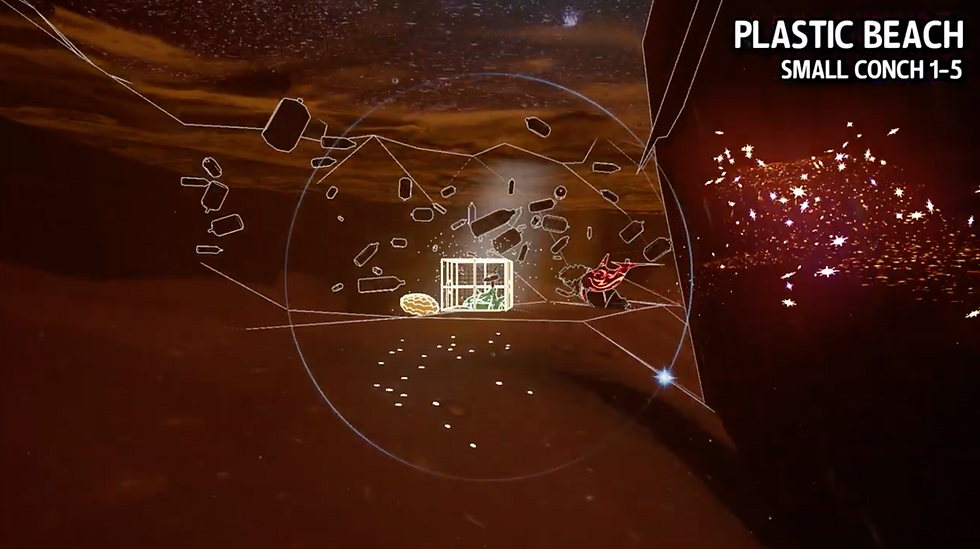
Conch 5 – Another conch is found by swimming through the spikey sea urchins that are found near the antenna looking structure in the middle of the area.

Mako Shark– In the city part of the level (somewhat near to the start of it) are a set of rocks you can break once you have the conch ability. Right behind those rocks is the mako shark.

POSEIDON
Crab 1 – The easiest crab to find is on your main path right near the start of the level.

Crab 2 – Another crab is found in the large open area somewhat near to the start of the level (the large open area with the upside down ship and the houses on the cliffside). As you first enter this area, swim low and to the right and you’ll find a small opening that leads to the crab.

Crab 3 – Another crab is found near the start of the houses on the cliff. Swim behind them and you’ll find a passageway that wraps around and has the crab in it.

Crab 4 - Another crab is found in the large open area somewhat near to the start of the level (the large open area with the upside down ship and the houses on the cliffside). Near the ocean floor in this area are some rock structures that you can swim under – the crab is hidden under one of these.

Crab 5 – In between the houses on the cliff is another crab.

Crab 6 – At the part where there are two AHDs next to one another, swim up and to the left and there’s a pathway that you can take. Break a rock on the way and you’ll find a crab.

Crab 7 – In the section of the level that you open up after you’ve defeated the Kraken and are swimming back toward the Elder whale, there’s a crab sitting on a ledge. It’s right near two forcefield pillars that you swim through. By the pillars, look down and echolocate and you’ll find the crab.

Crab 8 – In the very depths of the level in the area you swim to after you’ve beaten the Kraken and can swim down and take out some of the lower AHDs, there’s a part where there are some sea urchin spikes – find those and you’ll find the crab.

Crab 9 – In the area where the whale circles (where the whale knocked down the tanker to open your path) if you swim to the ocean floor you’ll find a cave entrance that leads to an AHD surrounded by rocks. Shut down the generator and you’ll be able to access more of this area behind the AHD. Swim into it and you’ll find a spot with some sea urchin spikes and the crab hidden there.

Mako Shark– In the area where the whale circles (where the whale knocked down the tanker to open your path) if you swim to the side and stay towards the water’s surface you’ll encounter two drones. Near to the second drone is a metal grate that you can break that has the mako shark behind it.

A.T.L.A.N.T.I.S.
Manta Ray 1– The easiest manta ray to find is the one right by the start of the bridge (by the New York Ferry sign).

Manta 2 – To the side of the bridge is a building structure – swim over it and you’ll see the manta there.

Manta 3 – At the very bottom of the ocean’s surface near to the launch station entrance that you enter is another manta ray.

Manta 4 – Inside the large hangar entrance to the launch station, if you swim to the right you’ll find the manta hidden there.

Manta 5 – In the large open area where the bridge is, on one side are two sloped buildings near each other. In between those buildings is another one of the mantas.

Mako Shark– Towards the very end of the launch station, where the last AHD that you need to contend with before entering the control room is, is a corner where the mako shark is resting.


Comments